$50 Roof Top Tent Upgrades!
$50 Roof Top Tent Upgrades!
These incredibly easy $50 upgrades will transform your rooftop tent camping experience! Camping shouldn't be about roughing it - we reckon the more comfortable you make your campsite, the more often you'll go camping - and that's the aim! Join our resident 12v tech-head Cahn as he decks out this rooftop tent with 12v power, dimmable LED lighting and USB outlets to charge phones and tablets. It's the best upgrade you'll ever make to any rooftop tent, and you'll have change from a $50 note too!
|
PARTS REQUIRED |
6m Solar Extension Lead, 4 Bar Camp Light Kit, 12v Control Box (optional) |
|
TOOLS REQUIRED |
Side cutters, crimpers, drill, 10mm drill bit, file, long-nosed pliers, heat source |
|
MATERIALS REQUIRED |
10A fuse and fuse holder (if not using 12v Control Box), switch (if not using 12v Control Box), cable ties, corrugated tubing, adhesive glue, heat shrink, spade terminal, ring terminals, 2x small enclosures, positive & negative binding posts/terminals, 2x DC outputs, USB outlet, adhesive back Velcro, adhesive cable hooks, super glue. |
PROJECT OVERVIEW
STEP 1

Measure the length from where you will mount the quick-connect plug to your 12v Control Box or switch and cut the 6m Solar Extension Lead to size.
STEP 2

Add corrugated tubing around the outside of the lead and mount the quick-connect plug under the corner of the tent with adhesive glue. Tidy up the wiring with cable ties..
STEP 3

Run the cable to the 12v Control Box or switch. In this circumstance, we’re running it through our cable gromet at the back of the headboard inside the canopy. Open up the 12v Control Box.
STEP 4

Strip the wires, add a spade terminal to the positive and a ring terminal to the negative. Crimp the wires and apply heat shrink.
STEP 5

Attach the negative terminal to the negative bus bar, and the positive to the switch. If you are using your own set-up, add a fuse. For safety, remove the fuse from the fuse box or fuse holder to ensure it is not live whilst you are working.
STEP 6

Measure the required length to run the other side of the Solar Extension Lead from the mounted quick-connect plug to the inside of the roof top tent and cut the cable to suit.
STEP 7

For the distribution box: Inside the enclosure, position the binding posts where you’d like them, and drill two pilot holes on the side where you’d like to run the leads (one input, one for USB). Then, use a 10mm drill bit and drill the holes for the leads, and glue the binding posts in position.
STEP 8
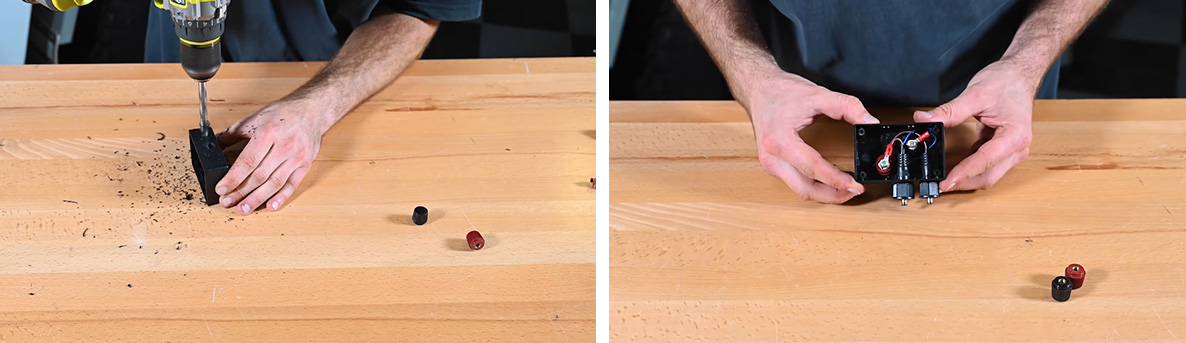
Drill holes on the other side for the DC outlets. Insert outlets into holes, cut and strip each wire and once in place, secure each outlet with glue. Crimp ring terminals to positive and negative wires, then attach to binding posts. Remember: Black to negative, red to positive.
STEP 9

Test fit distribution box and measure the length of the lead from the quick-connect plug underneath the tent, to the position of the box inside the tent. Cut the lead to suit. Feed lead through the hole, strip the wire, crimp on ring terminals and attach both wires to binding posts. Black to negative, red to positive.
STEP 10

To run the power to the USB, measure from the distribution box to where you would like to position the USB ports. Then, using the left-over wiring from your Solar Extension Lead, cut the required length and feed through the remaining hole. Strip the wire, crimp on ring terminals and attach both wires to binding posts. Black to negative, red to positive.
STEP 11

Add the terminal covers and add the lid to the box. Test fit in the tent to make sure the wires are correct lengths. Position the distribution box under the frame and run the lead around to where you’d like the USB box. Check that everything lines up and cut the lead if it is too long.
STEP 12
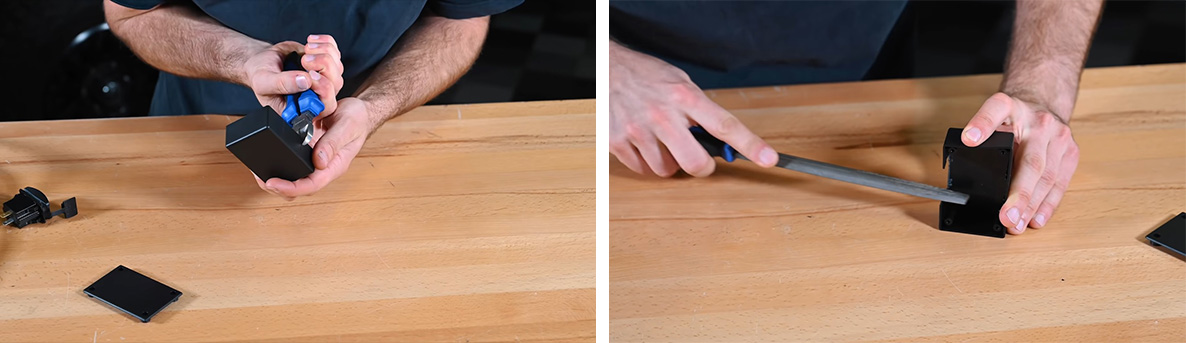
For the USB box: Line up the USB ports on the side of the enclosure, and mark where to cut a slot. Cut the slot and file any rough edges.
STEP 13

Drill a hole for the lead. Feed the lead through the hole, strip the wires, and add terminals to the end. Then, add heat shrink to keep the wires tidy and attach the terminals to the back of the USB ports. If necessary, use glue to stick the lead or USB in place. Screw down the lid.
STEP 14

Once all wired up, fit into the tent, add the fuse back in and test. Once all working, remove the fuse again to install the light.
STEP 15

For the light: Tape down two strips of adhesive black Velcro where you would like to mount the light, and two strips on the back of the camp light.
STEP 16

Connect the extension to the DC plug, along with the switch to complete the circuit. Attach adhesive cable hooks running down the inside of the roof and run the wiring along these. Add the fuse back in and test. Once all working, tidy up cables using the hooks and cable ties, and you’re all set!
Related Products