Phone lines open 8am-8pm AEST
- Specials & New
- Fridge/Freezers
- Batteries
- Camping Canvas Bags & Storage
- BBQ Canvas Bag
- Camp Oven Canvas Bag
- Clear Top Canvas Bag
- Clear Top Tall Canvas Bag
- Doona/Pillow Case Bag
- Canvas Recovery Bag
- Recovery Tracks Canvas Storage Bag
- Canvas Air Compressor Bag
- Roof Top Canvas
- Canvas Toilet Bag
- Canvas Toiletry Bag
- Canvas Travel Bag
- Canvas Fire Pit Bag
- Canvas Swag Bag
- Canvas Folding Solar Panel Bag
- Canvas Induction Cooker Bag
- Premium Duffle Bag
- Universal Storage Bag
- Gas Stove Canvas Bag
- 45L Tough Storage Box
- 78L Tough Storage Box
- 156L Tough Storage Box
Camping Accessories- Camping Chair
- Camping Table
- Collapsible Range
- Pocket/Dash Organiser
- Hanging Camp/Kitchen Caddy
- Upright Organiser
- 12v Heated/Electric Blanket
- 3m Sand Safety Flag
- Premium Roof Top Bag
- Car Seat Organiser
- Dirty Gear Bag
- Premium Duffle Bag
- Half Length Roof Top Bag
- Kings Plus Premium Seat Covers (Pair)
- Premium Canvas Seat Covers
- Premium Neoprene Seat Covers
- Heavy Duty Seat Covers
- Paddleboards
- His and Hers Vacuum Travel Mug
- Ground Grabba
- Supa Peg
- First Aid Kits
- Outdoor Protection
- Firelighter
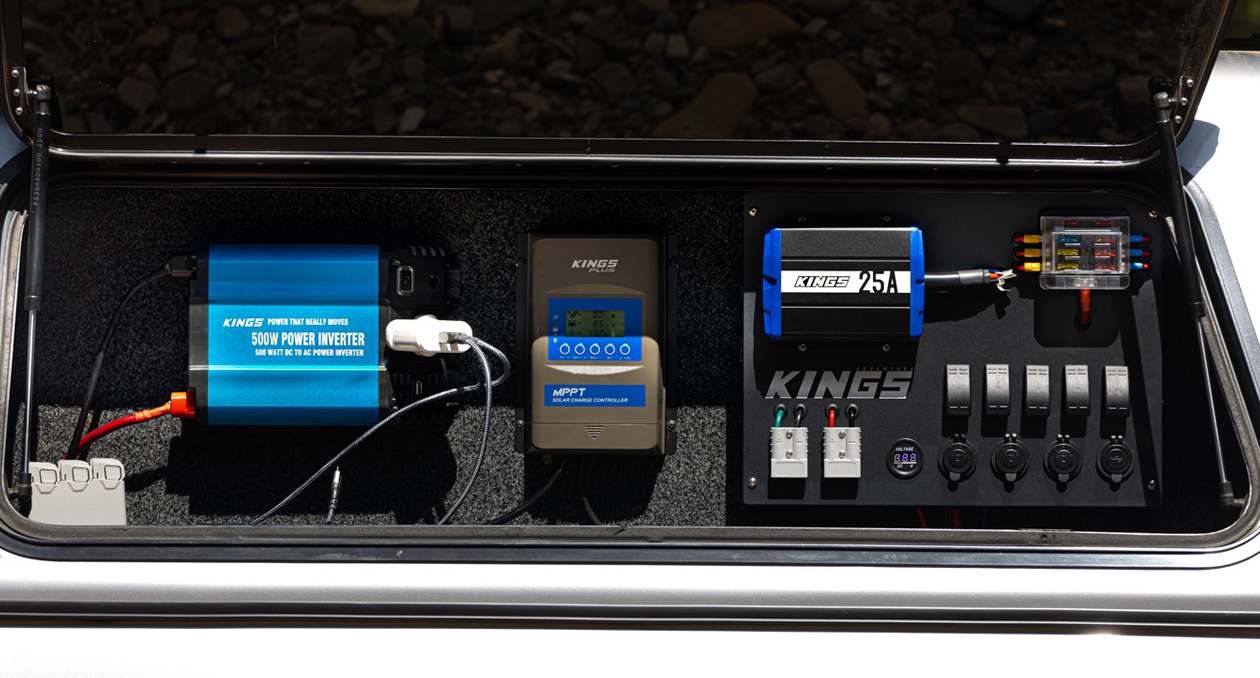
- Solar & Power
- 4WD

- Stores

- Tips & Tricks

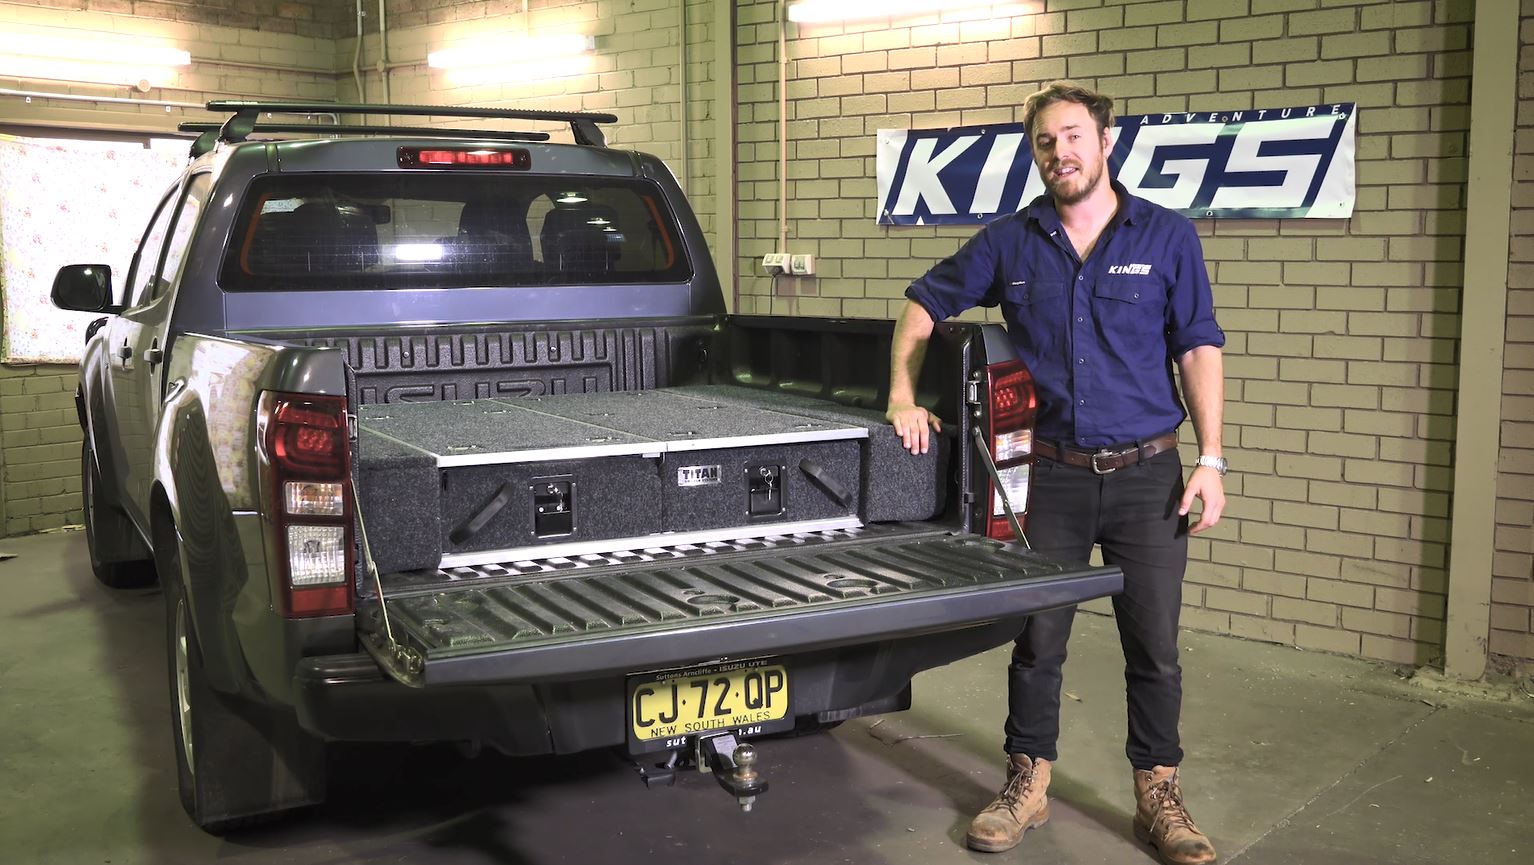
Give your Ute wings with Titan Rear Drawers!
This job doesn’t involve energy drinks, or a degree in aeronautical engineering!
Fitting a set of Titan Universal Wings to your Titan Ute Drawers is simple and can be knocked over in an afternoon with a handful of simple tools and a bit of common sense, and maybe an extra set of hands for lifting and maneuvering stuff around.
Even people with high school wood working experience under their belt should be able to knock this job out in a weekend!

We also have a full step-by-step video of how to install Ute wings on the 4WD Supacentre website for anyone who prefers a visual guide.
The first step to getting a set of Titan Universal Wings fitted to your Titan Ute Drawers is to get the drawers out of the vehicle, slide out the drawer tub, remove the top panels and turn your drawer frame on its edge.
Having your drawers on their edge allows you to begin aligning the included brackets onto the drawers edge and marking out the pre drilled holes location onto the un-drilled bracket.

Before marking with a felt tip pen make sure the brackets are flush and square.

Once marked you can use a punch to locate your pilot drill bit, followed by a 6.5mm Drill bit to open up the holes to the right size for the included fasteners.

When one side is completed, and you are happy that everything lines up well, flip the drawers over and repeat the previous steps along the other edge of your drawers.
When all the brackets have been drilled and their alignment double checked you can install the frame into your vehicle. This is where your mate will come in handy, to help you locate the drawers.
When your drawers are bolted down, you can fasten the brackets with the fasteners listed in the installation instructions. It’s time to reinstall your tubs and your drawer tops!

With a scrap piece of cardboard, it’s time to start making templates for your wings, the idea is to start big and slowly work them down to the right size. We recommend trimming them bit by bit, and taking your time, the more perfect they are the better your fit and finish will be. Once a snug template has been created, you’ll have to trim it to accommodate for the carpet thickness on both edges, so double up a piece of the included carpet and mark the width off on the straight edge of your template and trim the template down to size.

When you are happy with your templates for the front and back, you can repeat the steps for the other side, and then transfer your templates to the included plywood panels and trim down to size with a saw.

There are 2 ways to transfer your bracket mounting holes to your plywood templates, firstly you can measure them out and draft them up onto your wings and hope when you drill them through they line up with your fasteners
OR
Secondly, our favorite way, is to thread your fasteners in through the bottom of your brackets, and position your wing on top to exactly where it needs to be, and give each corner a light tap with a hammer to make an indent into your plywood piece.

Drill out the marked holes with a 6.5mm drill and double check the alignment with the riv-nuts
Now that everything is ready to go it’s time to stick on your marine carpet, we recommend using an adhesive that will adhere to the fabric and the timber,make sure to follow the adhesives instructions for the neatest finish, don’t forget to glue the sides edges.
Trim all of your excess carpet once the adhesive is dry.

Whilst your back wing is drying, mark out the location of the front wing, using the 2 slots on the middle bracket and the plug hole on the first bracket as a template, trace them onto your timber, making sure the wing is centered to allow for the carpet on all edges.
Use a 51mm holesaw to drill the plug hole, then align the two metal tabs with the slot marks you traced earlier. You can test fit with 1 screw in each tab and when happy with the fit, fit the other 4 screws and then carpet the wing.

When the carpet has been applied you can cut a hole for the screw plug, and mount it up. Repeat the process for the other side, and you are done!
An easy as installation will get your Titan Ute drawers looking schmick, and with your new infill panels you’ll have storage space all your mates will be envious of and all completed in a couple of hours with some simple tools!